このページで解説している内容は、以下の YouTube 動画の解説で見ることができます。
3拠点のVPN接続(本社:拠点A-支社:拠点B)
ここでは「本社:拠点A-支社:拠点B」間のネットワークを設定していきます。
「本社:拠点A-支社:拠点B」間は、VPNで接続します。
「本社:拠点A-支社:拠点B」間のネットワーク設定
下の赤枠の「本社:拠点A-支社:拠点B」間のネットワークを設定していきます。VPNの設定も行います。

●R2ルータ
R2>enable
R2#conf t
R2(config)#access-list 100 permit ip 10.0.0.0 0.255.255.255 10.4.0.0 0.0.255.255
R2(config)#crypto isakmp policy 1
R2(config-isakmp)#authentication pre-share
R2(config-isakmp)#encryption 3des
R2(config-isakmp)#hash sha
R2(config-isakmp)#exit
R2(config)#crypto isakmp key cisco address 200.200.200.2
R2(config)#crypto ipsec transform-set TS-IPSEC esp-3des esp-sha-hmac
R2(config)#crypto map MAP-IPSEC 1 ipsec-isakmp
R2(config-crypto-map)#match address 100
R2(config-crypto-map)#set peer 200.200.200.2
R2(config-crypto-map)#set transform-set TS-IPSEC
R2(config-crypto-map)#set security-association lifetime seconds 3600
R2(config-crypto-map)#interface f0/1
R2(config-if)#crypto map MAP-IPSEC
R2(config-if)#end
R2#copy run start
●R3ルータ
↓基本設定
Router>enable
Router#conf t
Router(config)#hostname R3
R3(config)#ip route 0.0.0.0 0.0.0.0 200.200.200.1
R3(config)#int f0/0
R3(config-if)#ip address 10.4.0.1 255.255.0.0
R3(config-if)#no shutdown
R3(config-if)#int f0/1
R3(config-if)#ip address 200.200.200.2 255.255.255.0
R3(config-if)#no shutdown
R3(config-if)#exit
↓VPNの設定
R3(config)#access-list 100 permit ip 10.4.0.0 0.0.255.255 10.0.0.0 0.255.255.255
R3(config)#crypto isakmp policy 1
R3(config-isakmp)#authentication pre-share
R3(config-isakmp)#encryption 3des
R3(config-isakmp)#hash sha
R3(config-isakmp)#exit
R3(config)#crypto isakmp key cisco address 200.200.200.1
R3(config)#crypto ipsec transform-set TS-IPSEC esp-3des esp-sha-hmac
R3(config)#crypto map MAP-IPSEC 1 ipsec-isakmp
R3(config-crypto-map)#match address 100
R3(config-crypto-map)#set peer 200.200.200.1
R3(config-crypto-map)#set transform-set TS-IPSEC
R3(config-crypto-map)#set security-association lifetime seconds 3600
R3(config-crypto-map)#interface f0/1
R3(config-if)#crypto map MAP-IPSEC
R3(config-if)#end
R3#copy run start
疎通確認
拠点A-拠点B間の疎通確認
PC1からPC2のIPアドレス「10.4.0.2」に対してpingを実行します。
C:>ping 10.4.0.2

pingは4度目の試行で成功しています。
カプセル化の確認
まず、拠点A-拠点B間に流れるパケットのカプセル化を確認します。
●シミュレーションモードに切り替えます。
・シミュレーションボタンをクリックします。

・「Show All/None」をクリックして、監視するプロトコルのチェックを、すべて外します。
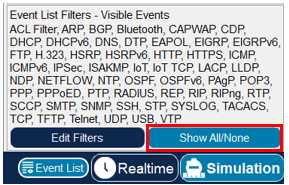
・「Edit Filters」ボタンをクリックして「ICMP」にチェックを入れます。


・PC1からPC2のIPアドレス「10.4.0.2」に対してpingを実行します。
C:>ping 10.4.0.2
PC1上に封筒が現れます。

・「Play Controls」の「▶|」ボタンをクリックします。

時間が1ステップ進みます。封筒がR2ルータに到達するまで、クリックします。

・R2ルータ上の封筒をクリックします。
・「Outbound PDU Details」タブをクリックします。

「ESP」ヘッダーでカプセル化されていることが確認できます。VPNで通信が行われていることが確認できます。
●リアルタイム・モードに切り替えます。
PC1からPC2へのpingを完了させます。
・「Realtime」ボタンをクリックします。

続きの設定は「3拠点のVPN接続(本社:拠点Aー支社:拠点C)」で行っていきます。